Wherever you decide to spend Super Bowl Sunday, whether at a friend’s house, public place or just kicking back at home, you’re going to want to be decked out in the gear of whichever team you’re rooting for. However, prices for the most basic of spirited items—a T-shirt—can run pretty high; even the pre-made Broncos tees at Walmart run about $20, and that’s certainly the low end of the spectrum. But have no fear, the Clarion has all the information you need on how to make an awesome custom tee for game day, so you can be the most stylish (and frugal) person in the room.
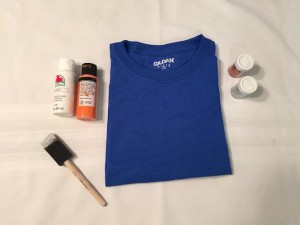
Items (purchased at Walmart)
1 plain blue, orange or white T-shirt ($3)
Acrylic paint in whichever colors you would like (sparkly orange: $1.50; white: $.50)
Sponge paint brush ($1)
Glitter (optional) ($1)
Grand total: $7
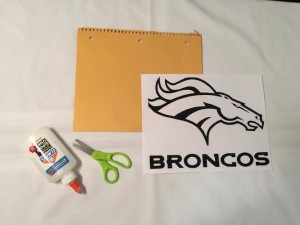
Print out the logo of whichever team you’re rooting for on plain printer paper. Paste this page on the cardboard back of an old notebook and cut out the outline of the logo (trying to paint right over printer paper will cause it to stick to the shirt). It’s going to be a bit tricky, but remember it doesn’t have to be perfect.
Next, place the outline on the shirt wherever you’d like. Make absolutely sure that it’s centered—the shirt is going to look very lopsided if not. Then go ahead and start blotting on and around the outline. You can make it very clean and tight around the stencil or a little
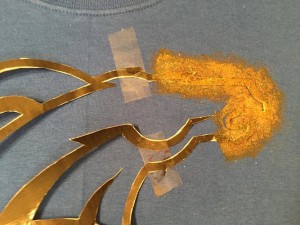
messy for a “spray paint” effect, it’s completely up to you. You can also decide whether to completely fill in the outline or just blot directly around it—creativity is key here. Keep in mind that if you choose a darker colored shirt, you will need to do several applications of paint to make sure that the color shows correctly, and remember that paint is bolder wet than dried.
To make the stencil easier to blot around, I suggest taping down the area directly around where you are currently applying paint (don’t put the tape over an area you’ve already painted, of course). If you want to incorporate glitter, sprinkle some over the paint while it’s still wet.
Wait for about 10 minutes, or until the paint is mostly dry, and remove the outline.
If you just want a shirt with a logo, go ahead and skip to the bottom paragraph. However, if you’d like to also incorporate your team’s name, read on.
If you would like to cut out letters in the same manner as the logo outline and blot around them as well, that is a perfectly valid option. However, I find
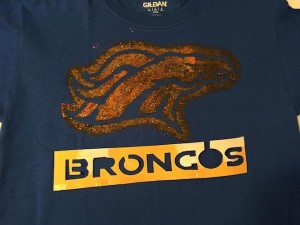
it impossibly tricky to line them all up correctly and then get them to stay that way while blotting, so I have an alternative suggestion: Cut the letters out as you normally would, but use the area around the removed letters to create a stencil. This way, the letters will be all lined up and significantly easier to blot. For Os and other letters with floating shapes in their centers, you have two options: connect them to the outer stencil (as I did with the B and first O) or remove and, using a bit of doubled tape, place them in their correct spots in the stencil (as I will do with the R and second O). Once you’ve cut out the stencil, tape down then blot away.
Once you’re all done painting and sparkling (if that’s your thing), let the paint dry for a full 24 hours. Afterward, iron over the acrylic paint so that it will adhere to the fabric and you can wash it without the paint coming off (I recommend delicate cycle or hand washing). After this it’s ready to make you look like the most spirited and fashionable person wherever you spend the Super Bowl. – KB


